Introduction
The objective this week was to launch our HABL rig into the upper atmosphere with a camera recording the journey. Typically, balloons such as these, reach altitudes of 60,000 to 120,000 ft which would be located in the stratosphere. The stratosphere is the second major layer of the Earth's atmosphere, sitting atop of the troposphere. The stratosphere is characterized by cool temperatures near the bottom and warmer temperatures higher up which is the direct opposite of the troposphere where the warmer air is located near the surface and cools as altitude increases. This is because the Earth's atmosphere is warmed from below from trapped radiation from the sun. This temperature inversion becomes important in regards to launching a balloon that high because the equipment (camera, GPS) will be exposed to very cold temperatures and thus need to be protected with insulation. Since helium is lighter than air, the balloon will rapidly ascend, expanding as it rises. Eventually the expansion of the gas inside the balloon will be so great that it will cause the balloon to burst. The ascent of the balloon can be controlled by how much helium is inside the balloon. Since the weather has been very inclement this spring, it was a gamble on when we could launch our rig. We finally got a nice day on Friday 4/26 with temperatures around 70°F and a slight wind which prompted us to launch the balloon.
Methodology
We had been preparing for this day on and off the past few months. Earlier on in the semester, we researched balloon types, weighed out a payload, and made a few rig designs so that we would be prepared for launch day. Around 8:30 a.m. on 4/26, some of the class arrived at school to fill the balloon with helium and to secure the parachute and camera rig to the balloon. The camera was placed in a square styrofoam container with a lens hole cut in the bottom in order to allow a clear area of view for recording.
 |
| Fig. 1 - The camera carriage being constructed. |
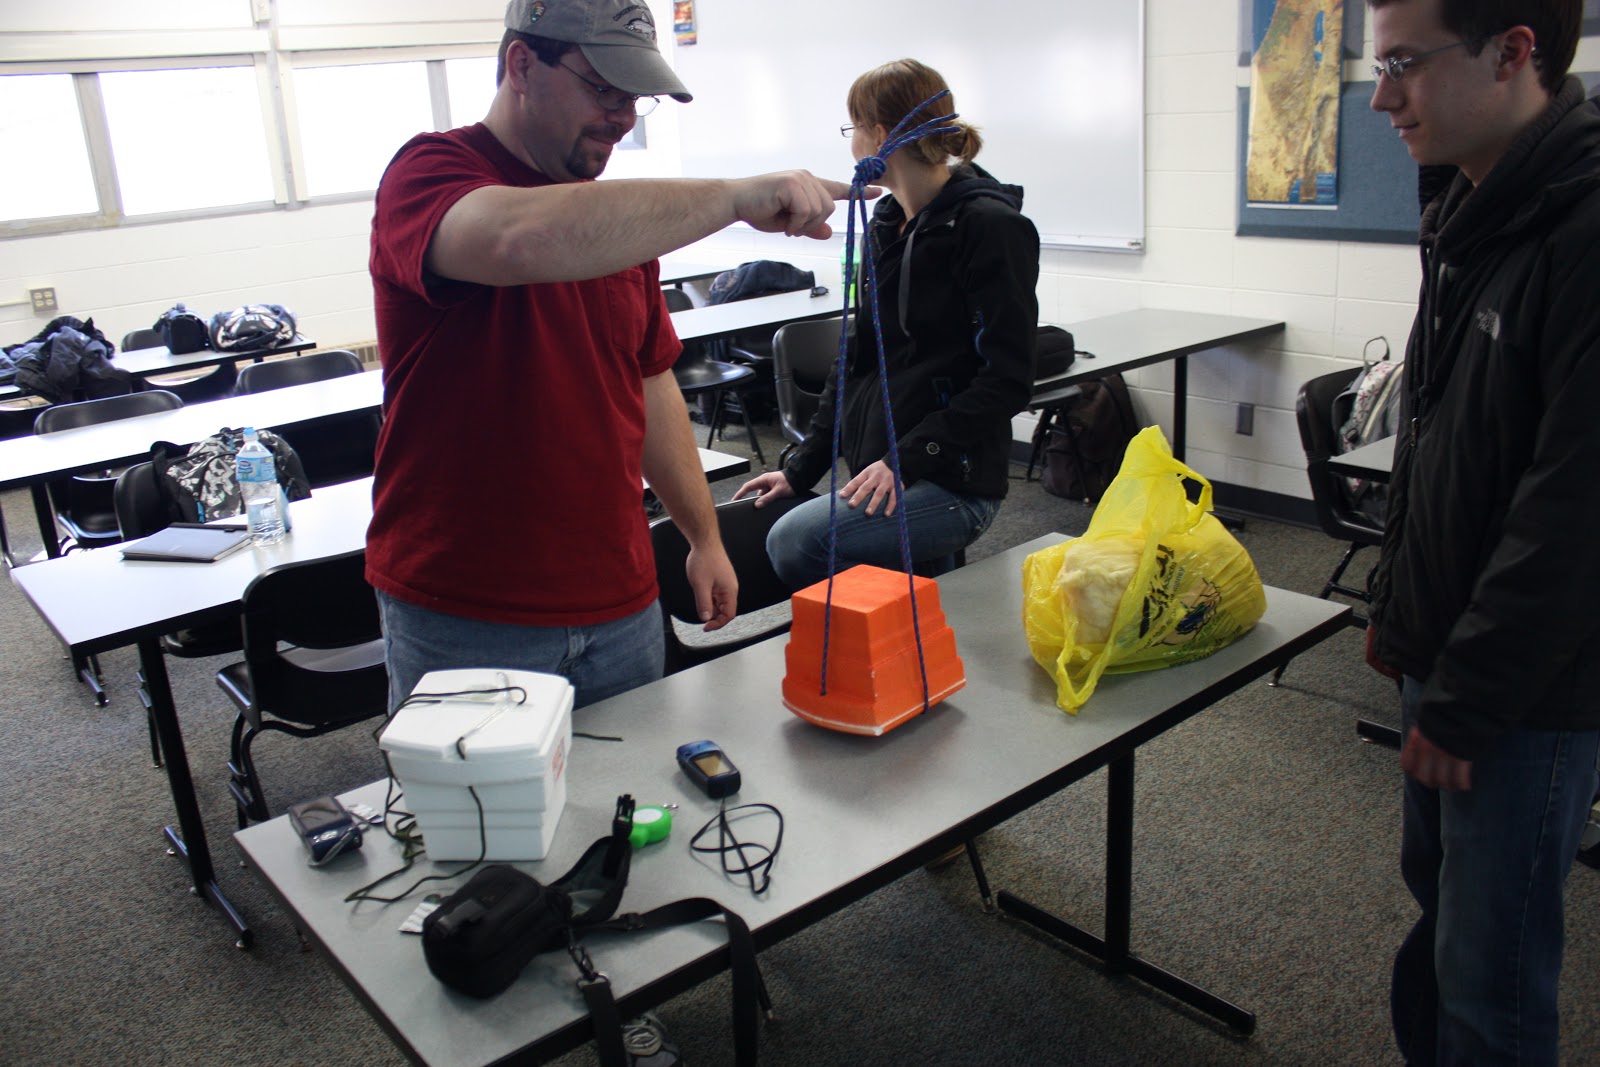
Hand warmers were shaken to activate the heat which would keep the camera from freezing up at high altitudes. A flip camera was used as the recording device which supports up to an hour of video recording. The rig is suspended from rope on each side, approximately 3 ft. length, and then the pieces are tied together at the top so that the carriage can swing freely in flight. Pieces of packaging tape were used to fasten the lid on the bottom so that the camera would not fall out during the course of the flight. The camera carriage was fastened to the balloon via carabiners. The balloon was larger than the one used for the aerial mapping exercises we performed over the last few weeks. It was necessary to get a larger balloon for this exercise as it would be required to obtain higher altitudes. The diameter of the balloon after filling it with helium exceeded 8 feet. We did not want to fill it to the max as the balloon would need room to expand as it rises. Once the balloon was filled to the desired level, we fastened the neck of the balloon with a few zip ties and then folded it over on itself and duct taped it liberally. A small GPS tracking device was also attached to the rig so that we would be able to locate the signal of where the rig lands. The camera carriage and parachute were then fastened and then we walked the HABL rig out to the center of campus to launch it.
 |
| Fig. 2 - Transporting the HABL rig to the launch pad. |
Results/Discussion
With a wind around 12-15 mph from the west, the balloon took off rather quickly from the launch pad in an easterly direction. The balloon managed to gain altitude rather quickly as it was blown away. After a few minutes, we lost sight of it and headed back inside to await a signal from the tracking device. Over an hour passed before we finally got a signal from the tracking device telling us that the rig had landed in a field near Marshfield, WI which is a little over an hour away from where we launched it. There were some strong high level winds which carried the HABL a distance of 78 miles! The complete video is posted below. The camera took an hour's worth of video and shut off shortly after the descent.
http://desi.uwec.edu/Geography/Hupyjp/Weather_Balloon_1024.asx (Here is a quick link until I can get the video embedded into the blog)
 |
| Fig. 3 - A still frame of a shot above the campus of UWEC. |
 |
| Fig. 4 - The balloon has ascended quite high at this point as the field of view has increased dramatically. |
 |
| Fig. 5 - The balloon close to its highest altitude taking an image off nadir allowing us to view the horizon. |
 |
| Fig. 6 - This still frame is my favorite image. How awesome is it that the balloon reached this height and captured this awesome image! At this point the air is very thin and the balloon probably popped shortly after. |
 |
| Fig. 7 - The balloon got caught in the canopy of a tree 50 ft. off of the ground on its way back down to Earth. |
 |
| Fig. 8 - Professor Hupy recovers the camera carriage after free climbing the tree and sawing off the branch the rig was hung up on. |
 |
| Fig. 9 - The balloon started to travel in a northwest direction from the launch location as it passed over the U.S. 53 bypass. |
 |
| Fig. 10 - The HABL rig is passing by Lake Eau Claire here, about 20 miles from the launch location and has since switched to a southeasterly direction of movement. |
 |
| Fig. 11 - The HABL covered approximately 78 miles in its journey before landing in the country near Marshfield, WI. |
Conclusion
This exercise was probably my favorite one this semester as it was awe-inspiring to see the results from the HABL flip camera. I have never even considered an opportunity where I could be a part of a project sending an object that high into the air and being able to recover video from it. Looking at the still frames from 100,000 ft. is just mind boggling. I wish that the camera rig had been more stable throughout the flight as it can be very nauseating to watch the video with everything spinning so fast. A popular idea on fixing camera stability on a balloon rig is that of a gyro-stabilized contraption so that the camera remains in a fixed position as the unit rotates with the balloon. This would be immensely helpful for the next launch as the video quality would be much improved and more still frames could be extracted. The other limitation of this launch was the camera being used. The Flip Cam could only record up to an hour of video which ended up cutting out much of the descent. A GoPro camera would be ideal for this sort of application as it is more rugged and can record for a much longer time as well as providing stunning video quality. These changes will require more money but would be well worth it as the end product would be that much better. A proposal has also been stated that for the next launch, there should be a camera taking video in the near infrared (NIR) to get satellite quality imagery. Also, a thermometer, barometer, and anemometer should be sent up with next time as well to collect temperature, pressure, and wind speeds at different altitudes to better understand the upper atmosphere. There are a lot of really cool and practical applications that this sort of project can be used for. The event was profiled by a local paper as well which can be read here:
http://www.uwec.edu/News/releases/13/05/0507HABL.htm.


No comments:
Post a Comment